Showing posts with label nail art. Show all posts

Wednesday, October 26, 2011

Purple Nail Arts

Purple is my favorite color.  I have been playing with a few purple nail polishes lately.  I really love how the nail art turned out when light purple was the base.  So elegant and yet cute.  Here are some photos of the designs I have tried lately...

Starry night...
Achieved Using
Essie purple polish
Sally Hansen XtremeWear in black
Poshe top coat
Konad m3 + BM5 templates


Crisscross French Nail...

Achieved Using
Revlon gum drop
Red Earth polish in a dark shimmery purple
Poshe top coat
Konad m64 template 


Purple Garden?!

Achieved Using
Sally Hansen Hard as Nails in 
Sally Hansen XtremeWear in white
Sally Hansen top coat
BM20 template 
light purple rhinestones

Wednesday, March 23, 2011

Blue & White Strips

Lately I have been thinking of ways to use two of my newly acquired nail polishes. Last Sunday while going through my nail art image plates (from bundlemonster on Amazon), I found the perfect solution.

Since a picture is worth a thousand words, here are 4 thousand words at once.

What I used:
Nicole by O.P.I. Party In the Penthouse + Gosh silver + Poshe fast drying top coat

First I started off with 2 layers of blue nail polishes.  Wait for it to dry a bit. Next, from the BM20 plate, I transferred these pretty silver strips on top of the blue nail polishes.


And here you have designs that remind me so much of Hershey's kisses. Yum~ 

Without flash....

I love how these image plates give you really professional looking manicure.  I would say even better than the ones I had from a beauty salon a week ago.  hmm...I still can't stop staring at my nails.  ^_^

Thursday, January 6, 2011

Having fun with nail art & rhinestones (LOTS!)

Recently, I became interested in nail arts. I found these packages of colorful rhinestones and beads from a local store and thought I just had to try these out.  Would you look at these gorgeous beads and rhinestones?  Seriously, click on it and look at the full size photo!  They are eye candies~


 If you see my previous gothic nails (3D nail deco with Konad), this would be my second attempt with these glue-on 3D nail decoration.  Without further ado, here are my nails...

I was going for an elegant style that mimics the feel of those Japanese/Korean acrylic nail arts, which couldn't (shouldn't?) be duplicated exactly by regular nail polish.  The decorating was fun but not so easy.  Mind you my 10 nails took a FEW hours to do with countless re-do's.

Sunday, December 19, 2010

First attempt with Konad and nail decoration~

Work has kept me busy, which led to no posting for such a long time.  >_<  So here is a quick post about the nails I did today.  I have been dying to try the Konad nail art.  I was trying for a Gothic feel and here are the results.....


Pardon me for the cracked skin....I only remembered to moisturize them after I saw how badly dehydrated they were in the photos.

I'm still a novice in both Konad and 3D nail arts.  I realized half way through that the designs were a bit too different on each nails.  However at that point,  I just couldn't bare myself to redo everything again.  Any how, I'm quite satisfied for my first attempt!

Monday, July 26, 2010

Polymer Clay Nail Arts

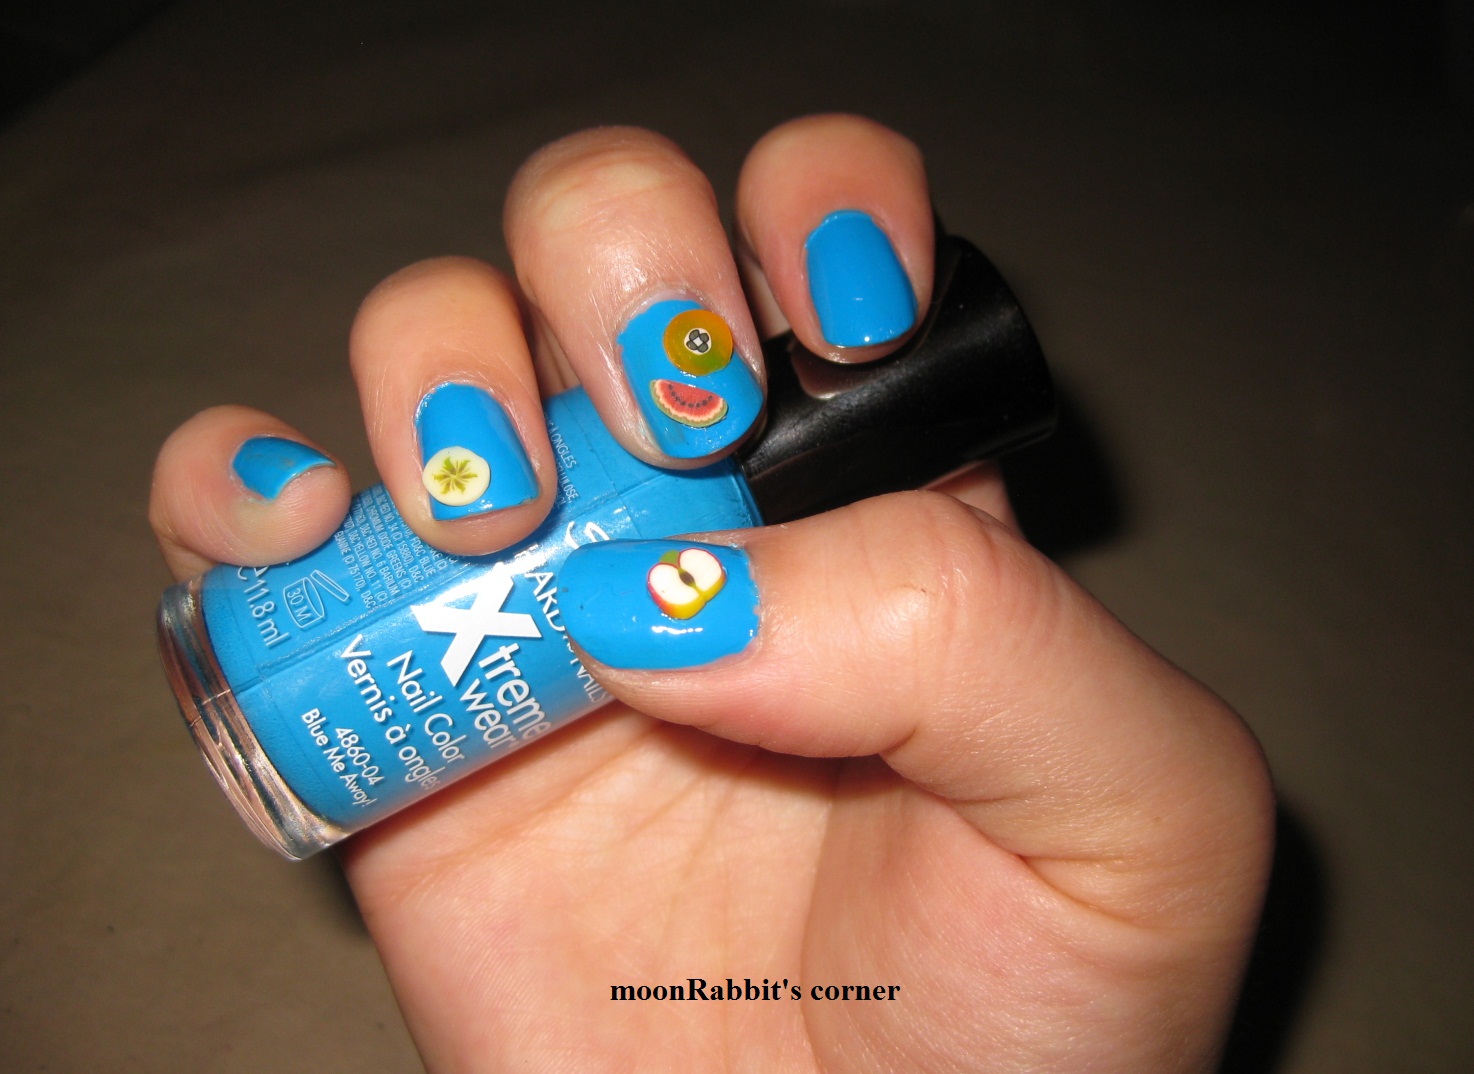
Lately, it seems like these clay nail art decoration has become more and more popular.  After my initial encounter where I decided to order some, I've started to notice fellow makeup lovers mentioning these on their blogs.  This weekend, I finally had some time and tools to play around with these yummy looking clay sticks.

I got 10 different designs of fruit slices.  They come in a 5cm stick so I had to slice these up thinly myself.  It took some practice and I did create some failures along the way.  However I totally enjoy the process and final look.

"Yeah~ we are the failures", says these half slices....

To add some spice, I psedo-randomly placed a few slices on some fingernails.  I think having the same design on every single nail will be slightly boring and not so pretty.  I have tried two methods to put these on.  1) place slices on top coat then seal again with another top coat layer.  2) Use nail glue and as an option, seal with top coat. 

Check out below for my yummy fruity nails. 


I still can't decide which method works best as I had fall out within a day or two.  These "incidents" occurred when I washed my hair, went to a Jack & Jill party, violently (haha) flipping through some stuffs in a drawer and mysteriously throughout the days.  I was really keen on maintaining these so I kept on applying new slices back.  For their short lifespan, they received lots of love and fulfilled their duties well.  

After more practice, I will do a more detailed post on these cute little nail deco.